How To Create Pop-Ups Using WordPress Popup Maker Plugin?

To create popups using the “Popup Maker” plugin for WordPress, follow these steps:

Step 1. Install and Activate the Plugin

Begin by logging into your WordPress dashboard. Navigate to Plugins > Add New and search for “Popup Maker.” Click on Install Now and then Activate once the installation is complete.

Step 2. Create a New Popup

After activation, you’ll see a new menu item labeled Popup Maker in your dashboard. Click on it, and then select Add Popup.

Step 3. Configure Popup Settings

In the popup editor, you can set a title for your popup. Below that, you’ll find the content area where you can add text, images, or any other media you want to include in the popup. Use the WordPress block editor or classic editor to format your content as needed.

Step 4. Set Popup Display Options

On the right side of the editor, you’ll find the Popup Settings panel. Here, you can configure various display options, such as:

  • Triggers: Choose how the popup will be triggered (e.g., on page load, click, scroll).
  • Targeting: Define where the popup should appear on your site (specific pages, posts, or categories).
  • Display Conditions: Set rules for when the popup should show, like only on mobile devices or after a certain time.

Step 5. Customize Popup Appearance

In the same settings panel, you can also customize the appearance of your popup. Options include setting a theme, adjusting the size, and adding animations. Explore the Appearance settings to ensure your popup aligns with your site’s design.

Step 6. Publish the Popup

Once you’re satisfied with the content and settings, click the Publish button to make your popup live.

Step 7. Test the Popup

Visit your website to test the popup. Make sure it appears as expected and functions correctly based on the triggers you’ve set.

Step 8. Monitor Performance

After your popup is live, you can monitor its performance. Popup Maker provides analytics features to track views, conversions, and other metrics. Use this data to refine your popups for better results.

By following these steps, you can effectively create and manage popups using the “Popup Maker” plugin, helping to boost your sales, conversions, and subscriber lists.

How To Insert Table Of Contents In WordPress?

To insert a Table of Contents (TOC) in WordPress, start by installing a TOC plugin. Log in to your WordPress dashboard and go to Plugins > Add New. Search for “Table of Contents” and select a popular plugin like Easy Table of Contents or LuckyWP Table of Contents. Click Install Now and then Activate the plugin. I personally use LuckyWP Table of Contents, its main features are:

  • Automatical insertion of a table of contents (configure post types and position).
  • SEO-friendly: table of contents code is ready to use by Google for snippets on result page.
  • Insert by shortcode, Gutenberg block, or widget.
  • Button on the toolbar of the classic editor.
  • Gutenberg block into “Common Blocks”.
  • Setting the minimum number of headings to display a table of contents.
  • Setting the depth of headings for a table of contents.
  • Skip headings by level or text.
  • Hierarchical or linear view.
  • Numeration items: decimal or Roman numbers in order or nested.
  • Customizable appearance: width, float, title font size and weight, items font size, colors.
  • Color schemes (dark, light, white, transparent, inherited from theme) and the ability to override colors.
  • Toggle Show/Hide (optionally)
  • Customizable labels.
  • Smooth scroll (optionally).
  • Setting offset top for the smooth scroll.
  • Wrap table of contents with <!–noindex–> tag (optionally).
  • Pretty hash in the URL (like example.com/faq/#how_do_this).
  • RTL support.
  • Override global settings are available for a particular post.
  • Highly compatible with WordPress themes and plugins.

Once activated, configure the plugin settings by navigating to Settings > Table of Contents (or the specific plugin name). Here, you can adjust how and where the TOC will appear, including options for automatic insertion into posts or pages, which headings (H1, H2, H3, etc.) to include, and customization of the TOC’s appearance.

If you prefer to insert the TOC manually, you can use the TOC block or shortcode provided by the plugin. For instance, adding [toc] In the desired location within your post or page, you will place the Table of Contents.

Finally, save your post or page. The Table of Contents will automatically display according to your settings, enhancing navigation for your readers.

How To Safely Update Your WordPress Website?

Updating a WordPress website is crucial to ensure its security, performance, and functionality. Here’s a step-by-step guide on how to update a WordPress website:

1. Backup Your Website:

Before performing any updates, create a full backup of your WordPress site, including files and the database. You can use plugins like UpdraftPlus or BackupBuddy for this task.

2. Update WordPress Core:

  • Dashboard Notification: WordPress usually displays a notification when updates are available. Go to your WordPress Dashboard → Updates.
  • Automatic Updates: WordPress core updates can occur automatically for minor releases, but major updates may require manual intervention.

3. Update Themes:

  • Dashboard: Navigate to Appearance → Themes. If there’s an update available for your active theme or any installed themes, you’ll see an update notification.
  • Update: Click on “Update” for each theme that requires an update.

4. Update Plugins:

  • Dashboard: Go to Plugins → Installed Plugins. Any plugins with available updates will have a notification.
  • Update: Select the plugins needing updates and click “Update” in bulk or update each plugin individually.

5. Update WordPress Database (if prompted):

Sometimes, WordPress updates require database changes. If prompted after updating the core or plugins, follow the on-screen instructions to update the database.

6. Check Website Functionality:

After updating, thoroughly check your website’s functionality, including navigation, forms, contact pages, and any critical features to ensure everything works as expected.

Tips for Safe Updates:

  • Keep Everything Updated: Regularly update WordPress core, themes, and plugins to the latest versions for security and performance improvements.
  • Test Updates on Staging: Before applying updates on your live site, consider testing updates on a staging site or creating a backup to test updates in a controlled environment.
  • Review Release Notes: Check the release notes or changelog for updates to understand what changes or fixes are included.
  • Update Regularly: Consistent updates reduce the risk of security vulnerabilities and keep your site functioning optimally.

Notes:

  • Always perform updates during low-traffic periods to minimize potential disruption.
  • Use a reliable hosting provider that offers automatic backups and easy rollbacks in case of issues.
  • If your site uses custom code, ensure updates won’t conflict with customizations, or consider consulting with a developer.

Remember, while updates are crucial for security and performance, it’s essential to approach them cautiously to prevent potential compatibility issues or conflicts with customizations.

How Humming Bird Crital CSS Improves Website Loading Time?

Hummingbird is a WordPress performance optimization plugin developed by WPMU DEV. It offers various tools and features to help speed up your WordPress website. One of its key features is “Critical CSS,” which is a technique used to improve web page loading times by prioritizing and optimizing the rendering of above-the-fold content.

Here’s an overview of Hummingbird’s Critical CSS feature:

Critical CSS Generation

Critical CSS is the minimal CSS required to render the visible part of a web page (above-the-fold content). It helps reduce render-blocking resources, which can slow down page loading.

Hummingbird’s Critical CSS feature generates this essential CSS for your pages automatically.

Above-the-Fold Optimization

The above-the-fold content refers to the part of a web page that’s visible without scrolling. Critical CSS optimization focuses on loading this portion of the page quickly.

By delivering the Critical CSS inline or asynchronously, it ensures that the most important content appears promptly, enhancing the user experience.

Minimization of Render-Blocking Resources

Render-blocking resources, such as large CSS files, can delay page rendering. Critical CSS optimization aims to reduce the impact of render-blocking resources by optimizing and delivering only what’s necessary for the above-the-fold content.

Automated Process

Hummingbird’s Critical CSS feature automates the process of generating and applying Critical CSS to your website. You don’t need to manually extract or configure Critical CSS for individual pages.

Performance Improvements

By optimizing the rendering of above-the-fold content, Critical CSS can significantly improve your website’s perceived loading speed and page performance, leading to better user engagement and potentially higher search engine rankings.

Customization and Control

Hummingbird allows you to customize the Critical CSS settings to suit your website’s specific needs. You can define which pages and CSS files should be optimized, ensuring a tailored solution.

Compatibility and Testing

Critical CSS should be generated with care to ensure it doesn’t break the website’s design or functionality. Hummingbird includes tools for testing and fine-tuning the Critical CSS to maintain compatibility with your site’s appearance and functionality.

It’s important to note that while Hummingbird’s Critical CSS feature can help improve page loading speed, achieving optimal results may depend on various factors, such as your website’s theme, the complexity of your CSS, and the specific pages you want to optimize. Careful configuration and testing are key to ensuring that your site continues to look and function as expected while benefiting from the performance enhancements of Critical CSS.

How To Sell Digital Files On Your Blog Or Website?

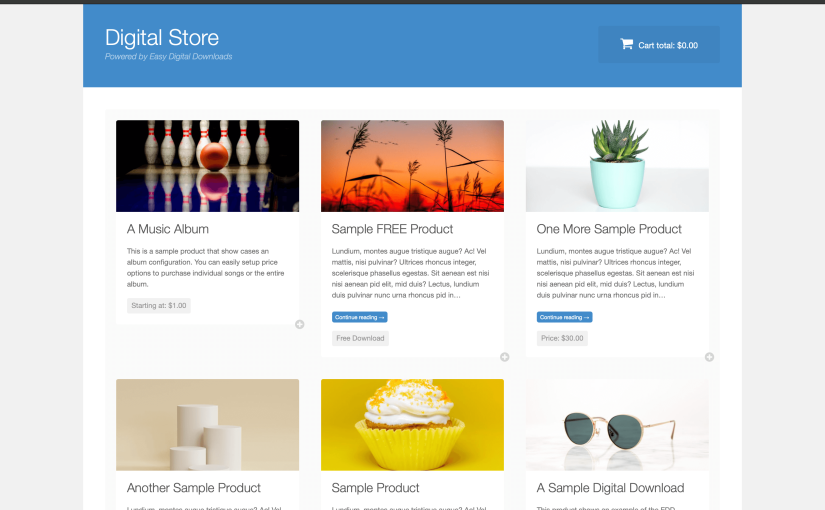
Easy Digital Downloads gives you unlimited products with no hidden listing fees, unlimited products, unlimited transactions, and unlimited possibilities. It is a popular WordPress plugin designed to facilitate the sale of digital products and services on your website. Whether you’re selling e-books, software, themes, music, or any other digital item, EDD provides the necessary tools to manage and sell your products with ease.

Digital Product Sales: EDD focuses specifically on digital products, making it an ideal solution for those who want to sell digital downloads or services. It allows you to offer various types of digital content, such as e-books, software, videos, audio files, and more.

Customizable Checkout: EDD offers a customizable and straightforward checkout process for your customers, making it easy for them to purchase digital products securely.

Secure Downloads: EDD includes built-in protection for digital downloads, helping prevent unauthorized access to your files. Customers receive unique download links and access keys.

Payment Gateway Integration: EDD supports a wide range of payment gateways, including PayPal, Stripe, Amazon Payments, and many more. You can offer your customers multiple payment options.

Extension Ecosystem: EDD provides a wide variety of extensions and add-ons that can enhance your online store’s functionality. These extensions include tools for email marketing, software licensing, affiliate marketing, and more.

Sales and Earnings Tracking: The plugin provides comprehensive reporting and tracking tools, allowing you to monitor your sales, earnings, and customer behavior.

Discounts and Promotions: EDD allows you to create and manage discount codes and promotional offers to attract and retain customers.

Customer Management: You can manage customer accounts, including order history, account information, and access to downloadable products.

Product Variations: EDD lets you offer different versions or variations of digital products, such as different file formats, package sizes, or licensing options.

Localization and Multi-currency Support: It supports localization, which means you can translate your store into various languages, and multi-currency support for selling to a global audience.

Developer-Friendly: EDD is developer-friendly, providing hooks, filters, and documentation for those who want to customize and extend its functionality.

Free and Premium Versions: While there is a free version of Easy Digital Downloads available, premium extensions and add-ons are also offered for enhanced functionality and customization. The pricing for premium extensions may vary.

Easy Digital Downloads is widely used by e-commerce entrepreneurs, authors, developers, and anyone who wants to sell digital products or services online. It’s known for its user-friendly interface, extensive documentation, and a community of developers and users who can provide support and resources to help you set up and manage your digital download store efficiently.

How To Secure Images By Signing Or Watermarking Them On Your Website?

Envira Gallery is a popular WordPress plugin designed to help users create and manage image and video galleries on their WordPress websites. It offers a user-friendly interface and a range of features that make it easy for individuals and businesses to showcase their multimedia content.

It also offers a variety of add-ons that extend its functionality. These add-ons include features like watermarking, social media integration, image proofing, WooCommerce integration, and more. This post is about one such addon that lets you watermark the images on your blog or website.

Install and activate the Envira Gallery plugin on your WordPress website. You can find and install it from the WordPress Plugin Directory or upload it manually. Now follow these steps:

  1. Create a Gallery: In your WordPress dashboard, go to “Envira Gallery” and click “Add New” to create a new gallery or edit an existing one.
  2. Add Images to Your Gallery: Once you’re in the gallery edit screen, click on the “Select Files from Computer” button to add the images you want to include in your gallery.
  3. Configure Your Gallery Settings: Scroll down to the “Gallery Configuration” section. Here, you can configure various gallery settings. To enable watermarking, you need to use the Envira Gallery Watermarking add-on, which is available in the premium version of the plugin.
  4. Enable Watermarking: If you have the Watermarking add-on activated, you’ll see an option in the gallery settings for “Enable Watermark.” Check the box to enable watermarking for this gallery.
  5. Configure Watermark Settings: Once you enable watermarking, additional settings will appear. You can configure your watermark settings such as watermark image,, its size, position, and opacity. Next, click the “Save” or “Update” button to save your changes.

Finally, you can preview your gallery to see how the watermark will appear on your images. If everything looks as expected, click “Publish” to make the gallery live on your website. For watermarking multiple galleries, simply repeat the same steps for each gallery.

How To Enable Jetpack Comment System On WordPress?

If you don’t already have Jetpack installed, go to your WordPress dashboard, navigate to “Plugins” > “Add New,” search for “Jetpack,” and install and activate the plugin. Upon activation simply follow the given steps:

  1. Connect Jetpack to WordPress.com: Follow the on-screen prompts to connect your site to a WordPress.com account. You may need to create one if you don’t have an existing WordPress.com account.
  2. Enable the Comments Module: In the Jetpack settings, go to the “Writing” tab and enable the “Comments” module.
  3. Customize Comment Settings: Under the “Discussion Settings” section in the WordPress dashboard, you can customize additional comment settings, such as comment moderation and notifications.

By following these steps, you can enable the Jetpack Commenting System on your WordPress website and offer your visitors a feature-rich and user-friendly commenting experience. This can help boost engagement and interaction with your content while providing robust moderation and anti-spam tools.

The WordPress With WooCommerce

WooCommerce is a popular open-source e-commerce platform for WordPress, one of the most widely used content management systems (CMS) in the world. It was first developed in 2011 by WooThemes and later acquired by Automattic, the company behind WordPress.com. WooCommerce is designed to help businesses and individuals set up and manage online stores with ease. Here are some key features and aspects of WooCommerce:

Integration with WordPress: WooCommerce seamlessly integrates with WordPress, allowing users to add e-commerce functionality to their existing WordPress websites or create new online stores from scratch.

Open Source: WooCommerce is open-source software, which means it’s freely available for anyone to use, modify, and extend. This makes it highly customizable and adaptable to various business needs.

User-Friendly: It provides a user-friendly interface for managing products, orders, and customers, making it accessible to both beginners and experienced users.

Extensive Plugin Ecosystem: WooCommerce has a vast ecosystem of plugins and extensions available, allowing you to add additional features and functionality to your online store. These include payment gateways, shipping options, and marketing tools.

Flexible Product Management: You can sell physical and digital products, set up variable products with different options (e.g., size, color), and manage product inventory efficiently.

Payment Gateway Support: It supports various payment gateways, including PayPal, Stripe, and many more, enabling you to offer multiple payment options to your customers.

Shipping and Tax Options: WooCommerce provides built-in tools for managing shipping methods and calculating taxes, making it easier to set up your store’s logistics.

Customization: You can customize the appearance and functionality of your online store using themes and custom CSS. Additionally, developers can extend WooCommerce’s capabilities through code modifications.

Security: WooCommerce is developed with security in mind and regularly updated to address potential vulnerabilities. However, it’s essential to keep both WooCommerce and WordPress up to date for security reasons.

Scalability: WooCommerce can handle stores of various sizes, from small businesses to large enterprises. As your business grows, you can expand your online store’s capabilities with additional plugins and resources.

Analytics and Reporting: It provides basic reporting features to track sales, customer behavior, and other important e-commerce metrics. You can also integrate it with third-party analytics tools for more advanced insights.

Multilingual Support: WooCommerce supports multiple languages and can be easily translated, making it suitable for global e-commerce businesses.

Community and Support: Due to its popularity, WooCommerce has a large and active community of users, developers, and contributors who offer support, tutorials, and extensions. This community can be a valuable resource for troubleshooting and getting assistance.

In summary, WooCommerce is a versatile e-commerce platform that leverages the power and flexibility of WordPress to help individuals and businesses create and manage online stores. Whether you’re selling physical or digital products, WooCommerce provides the tools and resources you need to build and grow your e-commerce business.

How To Use Block Patterns In WordPress?

You can use a pattern to add a beautifully designed, ready-to-go layout to any WordPress site. You can use block patterns on posts, pages, and other custom post types you have on your website by following a few easy steps. There are many websites and themes that offer you pre-designed block patterns that can be used for various purposes.

To use Block Patterns in the WordPress block editor:

  1. Open the Block Editor: Edit an existing post or create a new one.
  2. Add a New Block: Click on the “+” icon in the top-left corner of the editor to add a new block.
  3. Browse or Search Patterns: In the block inserter, look for the “Patterns” tab. Here, you can browse through available Block Patterns or use the search bar to find a specific one.
  4. Insert a Pattern: Click on a Block Pattern to insert it into your post or page.
  5. Customize: After inserting a Block Pattern, you can customize it by editing individual blocks, adding more blocks, or adjusting styling options.
  6. Publish or Update: Once you’re satisfied with the content and layout, save your changes or publish your post or page.

WordPress includes a variety of built-in Block Patterns, and you can also create custom Block Patterns to suit your website’s unique needs. Block Patterns provide an efficient way to design your content, making it easier to create visually appealing and organized posts and pages without the need for advanced coding or design skills.

What Are WordPress Post Tags And How To Use Them?

WordPress post tags are a feature within the WordPress content management system that allows you to assign keywords or phrases to your blog posts. These tags help you categorize and organize your content, making it easier for both you and your readers to find and navigate related articles.

Tags are essentially keywords or short phrases that describe the main topics or themes of your blog post. They are meant to capture the essence of the content. They create an interconnected web of content on your blog. Readers can navigate from one post to another by clicking on tags that interest them, providing a seamless user experience.

How To Use Tags In Your Posts?

On your post-edit screen, you’ll find a section labeled “Tags” in the right-hand column. It’s usually located in the sidebar. To add tags to your post, click inside the “Tags” field. You can start typing a tag, and WordPress will suggest existing tags that match what you’re typing. If you see a relevant existing tag, click on it to select it.

If the tag you want to use doesn’t exist yet, you can type it in and press “Enter” to create a new tag. Tags are separated by commas, so you can add multiple tags at once.

Make sure your tags accurately describe the content of your post. This helps readers and search engines understand what the post is about. Don’t use an excessive number of tags for a single post. Stick to relevant and essential keywords or phrases. Over-tagging can dilute the effectiveness of your tags.

WordPress post tags are a valuable organizational and SEO tool that allows you to categorize and connect your content effectively. When used thoughtfully and consistently, they can enhance the user experience, improve search engine rankings, and encourage readers to explore more of your blog.